Key:
Again if you are not familiar with any of these stitches there are TONS of GREAT “how-to” videos on Youtube that will give you a walk through so you can complete Chee the Chibi Turtle with ease.
St= Stitch (I.E. the “V” in the chain/prior row)
INCR= Increase /add a St (increasing the overall number of stitches)
SC= Single crochet
DEC= Decrease stitch (Decrease the overall number of stitches)
HDC= Half Double Crochet
DBC= Double Crochet
Slip Stitch= Slip Stitch J
MC= Main Color (Dark Green in this tutorial)
SC= Secondary Color (Light Green in this tutorial)
FC=Fin Color (Brown in this tutorial)
Parts of Chee the Turtle is worked in the round so place your stitch marker when the round starts then follow the row steps. When you complete the row you will be back at the marker, move it to the new row and start the next row (and continue as so on). Instructions will tell you if worked in the round or if you need to turn the work :)
***I used a 5mm Hook but you can change the size up/down for whatever size you want! Just change the hook size to change the turtle size. Changing the pattern is not needed.
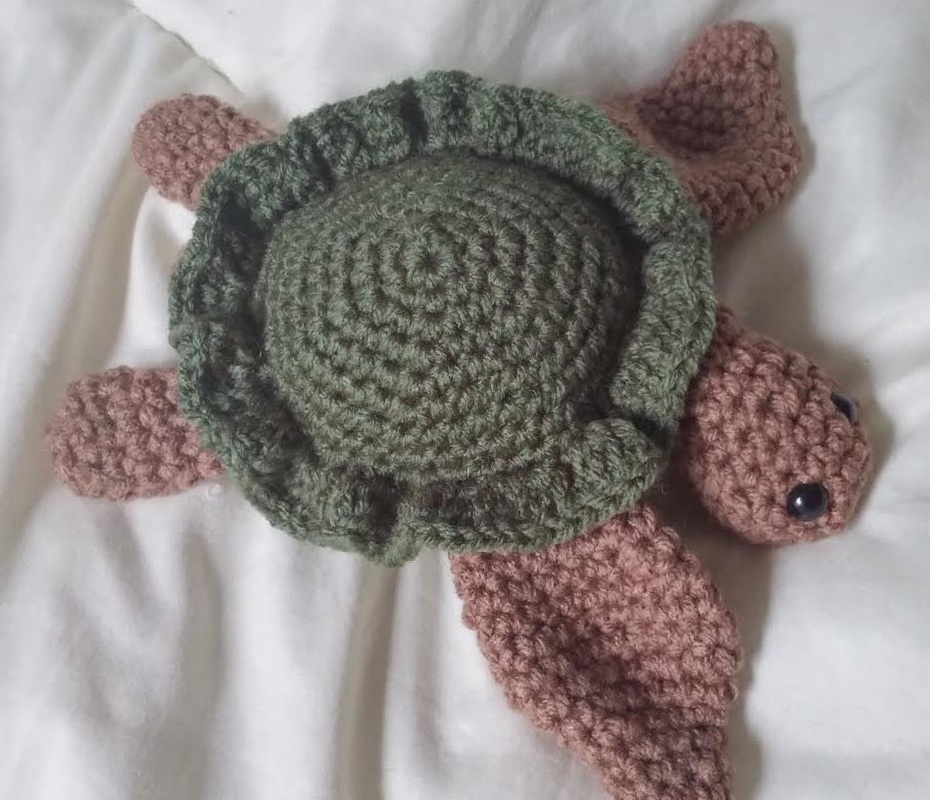
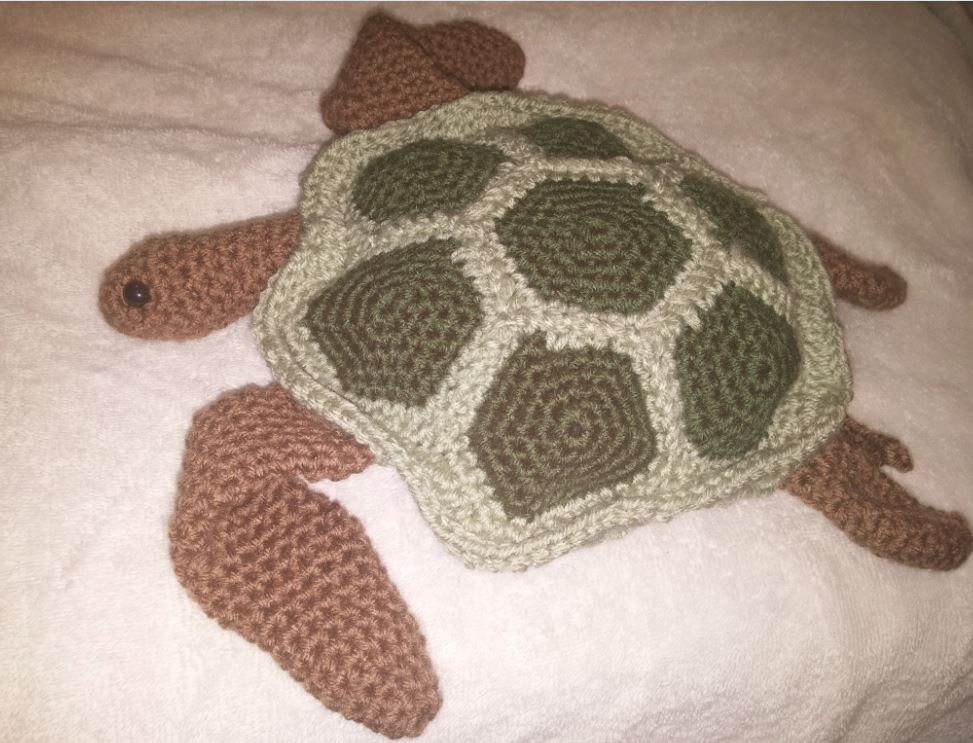
Chibi Sea Turtle Top Shell
(WORKED IN THE ROUND)
Using MC yarn
1. Magic loop (6sts) OR chain 3, slip stitch into first chain to make a circle and then 6 SC into circle
2. INCR every st (12)
3. INCR every 2d st (18)
4. INCR every 3d st (24)
5. INCR every 4d st (30)
6. INCR every 5d st (36)
7. (HDC in next SC space, 3 HDC in next SC space) repeat to end of row
8. Do not stuff
Chibi Sea Turtle Bottom Shell
Using SC yarn
1. Magic loop (6sts) OR chain 3, slip stitch into first chain to make a circle and then 6 SC into circle
2. INCR every st (12)
3. INCR every 2d st (18)
4. INCR every 3d st (24)
5. INCR every 4d st (30)
6. INCR every 5d st (36)
Front Leg
*Create TWO legs
Using FC yarn
1. Magic loop (6sts) OR chain 3, slip stitch into first chain to make a circle and then 6 SC into circle
2. INCR every 2nd st
3-4. SC Row
5. INCR every 2nd st
6. SC Row
7. INCR every 2nd st
8-9. SC Row
10. DEC, then SC to last 2 in row decrease last 2 st at end of row
11. DEC, then SC to last 2 in row. decrease last 2 st at end of row
12. SC Row
13. DEC, then SC to last 2 in row. decrease last 2 st at end of row
14. DEC, then SC to last 2 in row. decrease last 2 st at end of row
15. DEC, SC (to end of row)
16. SC Row and tie off
17. Do not stuff
Back Leg
*Create TWO legs
Using FC yarn
1. Magic loop (6sts) OR chain 3, slip stitch into first chain to make a circle and then 6 SC into circle
2. INCR every 2nd st
3-4. SC Row
5. DEC, SC to end of row
6. DEC, SC to end of row
7-9. SC Row
10. Do not stuff
Turtle Head
Using FC Yarn
1. Magic loop (6sts) OR chain 3, slip stitch into first chain to make a circle and then 6 SC into circle
2. INCR every st (12)
3-5. SC row
4. DEC, SC to end of row
now is a good time to insert some eyeballs!
5. DEC, SC to end of row
6.DEC, SC to end of row
7-11. SC Row
Tiny Turtle Tail!
*This is not worked in the round
Using FC yarn
1. Chain 10, Turn
2. Slip Stitch in next 3 chains (loops), SC, HDC in next 2 chains (loops), DBC to end of chain
Time to Assemble
Piece together the turtle! It's a good method to pin the fins, head and tail in place on the bottom shell. If you do not have pins you can add the parts as you sew the top and bottom shells together but its a little difficult.
Line up the bottom shell with the top shell, when you do this you will be sewing the bottom shell to the last row of SC of the top shell (you can see the difference between the SC and HDC rows)
When stitching the shells and body parts together use a straight stitch with the yarn needle.
Its ok, it WILL ruffle.
Stuff as you go!
Again if you are not familiar with any of these stitches there are TONS of GREAT “how-to” videos on Youtube that will give you a walk through so you can complete Chee the Chibi Turtle with ease.
St= Stitch (I.E. the “V” in the chain/prior row)
INCR= Increase /add a St (increasing the overall number of stitches)
SC= Single crochet
DEC= Decrease stitch (Decrease the overall number of stitches)
HDC= Half Double Crochet
DBC= Double Crochet
Slip Stitch= Slip Stitch J
MC= Main Color (Dark Green in this tutorial)
SC= Secondary Color (Light Green in this tutorial)
FC=Fin Color (Brown in this tutorial)
Parts of Chee the Turtle is worked in the round so place your stitch marker when the round starts then follow the row steps. When you complete the row you will be back at the marker, move it to the new row and start the next row (and continue as so on). Instructions will tell you if worked in the round or if you need to turn the work :)
***I used a 5mm Hook but you can change the size up/down for whatever size you want! Just change the hook size to change the turtle size. Changing the pattern is not needed.
Chibi Sea Turtle Top Shell
(WORKED IN THE ROUND)
Using MC yarn
1. Magic loop (6sts) OR chain 3, slip stitch into first chain to make a circle and then 6 SC into circle
2. INCR every st (12)
3. INCR every 2d st (18)
4. INCR every 3d st (24)
5. INCR every 4d st (30)
6. INCR every 5d st (36)
7. (HDC in next SC space, 3 HDC in next SC space) repeat to end of row
8. Do not stuff
Chibi Sea Turtle Bottom Shell
Using SC yarn
1. Magic loop (6sts) OR chain 3, slip stitch into first chain to make a circle and then 6 SC into circle
2. INCR every st (12)
3. INCR every 2d st (18)
4. INCR every 3d st (24)
5. INCR every 4d st (30)
6. INCR every 5d st (36)
Front Leg
*Create TWO legs
Using FC yarn
1. Magic loop (6sts) OR chain 3, slip stitch into first chain to make a circle and then 6 SC into circle
2. INCR every 2nd st
3-4. SC Row
5. INCR every 2nd st
6. SC Row
7. INCR every 2nd st
8-9. SC Row
10. DEC, then SC to last 2 in row decrease last 2 st at end of row
11. DEC, then SC to last 2 in row. decrease last 2 st at end of row
12. SC Row
13. DEC, then SC to last 2 in row. decrease last 2 st at end of row
14. DEC, then SC to last 2 in row. decrease last 2 st at end of row
15. DEC, SC (to end of row)
16. SC Row and tie off
17. Do not stuff
Back Leg
*Create TWO legs
Using FC yarn
1. Magic loop (6sts) OR chain 3, slip stitch into first chain to make a circle and then 6 SC into circle
2. INCR every 2nd st
3-4. SC Row
5. DEC, SC to end of row
6. DEC, SC to end of row
7-9. SC Row
10. Do not stuff
Turtle Head
Using FC Yarn
1. Magic loop (6sts) OR chain 3, slip stitch into first chain to make a circle and then 6 SC into circle
2. INCR every st (12)
3-5. SC row
4. DEC, SC to end of row
now is a good time to insert some eyeballs!
5. DEC, SC to end of row
6.DEC, SC to end of row
7-11. SC Row
Tiny Turtle Tail!
*This is not worked in the round
Using FC yarn
1. Chain 10, Turn
2. Slip Stitch in next 3 chains (loops), SC, HDC in next 2 chains (loops), DBC to end of chain
Time to Assemble
Piece together the turtle! It's a good method to pin the fins, head and tail in place on the bottom shell. If you do not have pins you can add the parts as you sew the top and bottom shells together but its a little difficult.
Line up the bottom shell with the top shell, when you do this you will be sewing the bottom shell to the last row of SC of the top shell (you can see the difference between the SC and HDC rows)
When stitching the shells and body parts together use a straight stitch with the yarn needle.
Its ok, it WILL ruffle.
Stuff as you go!

 RSS Feed
